Authenticating users with Microsoft OAuth
This post aims to provide a basic and quick jump start to getting set up with Microsoft OAuth in an Elixir app. By the end of this post, we will have a running Phoenix application that can authenticate using a Microsoft login, giving access to some primary user data.
Setting up our application
Get started by creating a new Phoenix app. Here I have called it example_app but feel free to choose any name you wish.
$ mix phx.new example_app
Once the command has finished, we can follow the instructions in the output and then start the server to ensure the app is running correctly.
$ mix phx.server
Let's check everything is set up correctly by visiting http://localhost:4000/, where we should see the Phoenix welcome page.
With our application up and running, we can start setting up the OAuth integration. We won't dive deep into how OAuth works in this post, but in summary, we need two endpoints. One to initiate the login request and a second to handle a callback from Microsoft.
For a more in-depth view of how this flow works, it's worth taking a look at the Microsoft OAuth documentation
Let's start by adding the ueberauth_microsoft package to the dependencies section of our mix.exs, followed by running mix deps.get.
defp deps do
  [
    {:ueberauth_microsoft, "~> 0.17"},
    # ... other dependencies
  ]
end
Next, we need to create a new controller to handle the two endpoints mentioned above. We will call this the auth_controller and add the Ueberauth plug at the top.
defmodule ExampleAppWeb.AuthController do
  use ExampleAppWeb, :controller
  plug(Ueberauth)
end
This plug helpfully takes care of implementing the first endpoint that we need. However, for the second endpoint, we must add this ourselves to define how the app behaves when it receives the callback.
Let's update the controller and add the following two functions.
defmodule ExampleAppWeb.AuthController do
  use ExampleAppWeb, :controller
  plug(Ueberauth)

  def callback(%{assigns: %{ueberauth_failure: _fails}} = conn, _params) do
    conn
    |> put_flash(:error, "Failed to authenticate.")
    |> redirect(to: "/")
  end

  def callback(%{assigns: %{ueberauth_auth: auth}} = conn, _params) do
    conn
    |> put_flash(:info, "Successfully authenticated (#{auth.info.email})")
    |> redirect(to: "/")
  end
end
With this in place, the first function will capture authentication errors such as an invalid OAuth configuration. The second function will capture a successful authorisation, allowing us to log the user into the app.
For this guide, we're only concerned with getting the integration configured. So, we will keep it simple and display a flash message with some data returned by the callback to confirm we have successfully accessed the user's data.
Before we move on, let's add our two new routes to the router.ex module.
Update the router and add the following scope definition.
scope "/auth", ExampleAppWeb do
  pipe_through(:browser)

  get("/:provider", AuthController, :request)
  get("/:provider/callback", AuthController, :callback)
end
With this in place, we're ready to register and configure our OAuth app.
Registering the app with Microsoft
Firstly, we must register our app within the Azure portal. Login to Azure, then search for the App registrations service.
From here, click New Registration, which will bring us to the app registration form.
Fill out the form with the following values (the name can be any valid value).
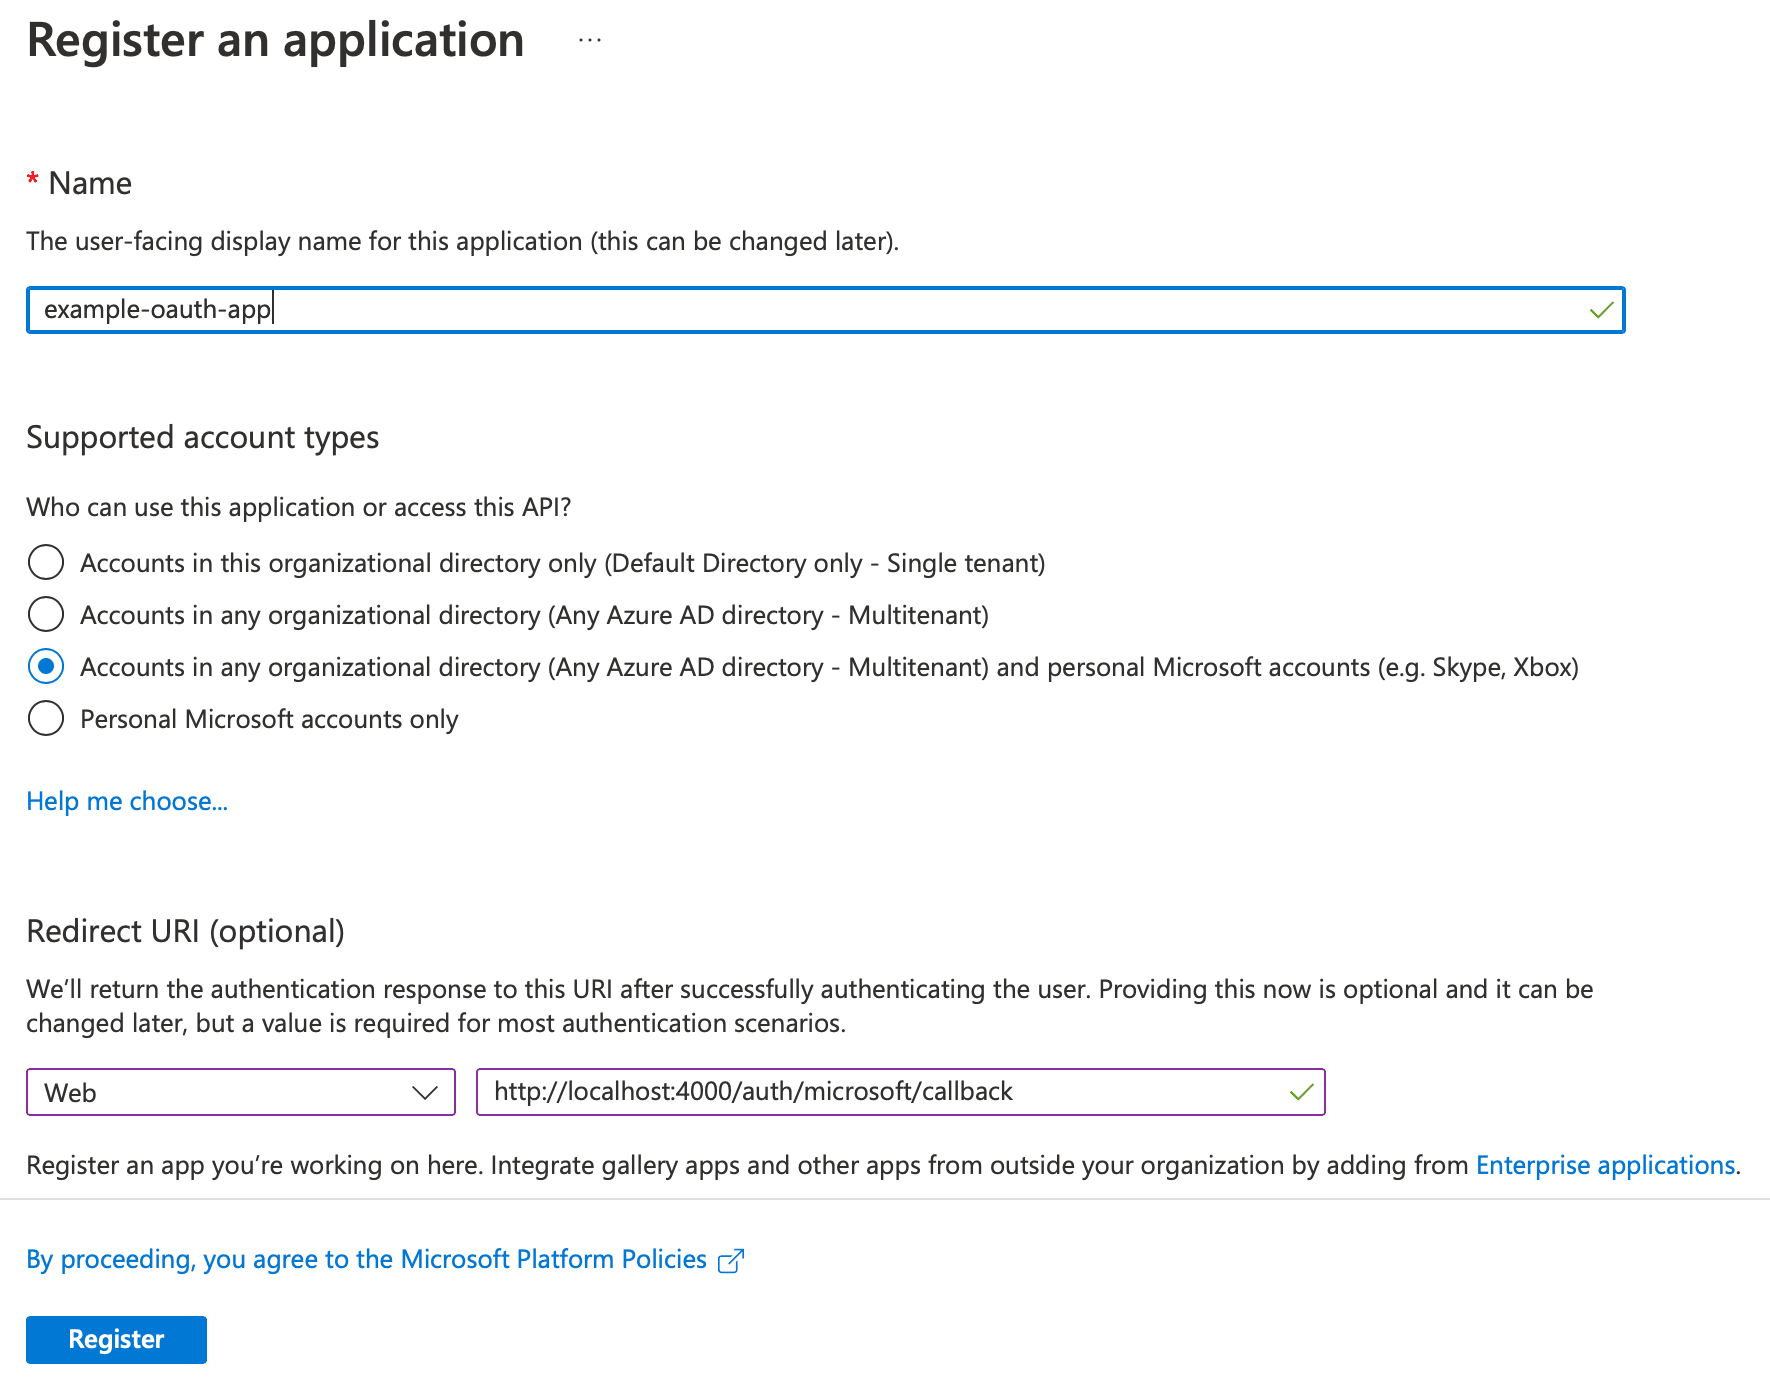
Click Register, and Azure will create the application for us. However, before moving back onto our code, we need to capture two values we will use to configure Ueberauth. The first value is the Application (client) ID, which we can see displayed on the screen Azure just redirected us to; quickly take note of this.
The next value is a client secret, which we need to create. On the left-hand navigation, click on Certificates & secrets and then click the New client secret button. On the popup that appears, enter any description and click Add. Azure will generate a secret; make sure to take note of the value under the Value column.
Configuring Ueberauth with our client credentials
Now we have the client id and secret; we can configure the ueberauth library and attempt our first login.
The first thing we need to do is tell Ueberauth that we want to use Microsoft authentication.
Add the following to the config.exs file.
config :ueberauth, Ueberauth,
  providers: [
    microsoft: {Ueberauth.Strategy.Microsoft, []}
  ]
Next, we need to configure the ueberauth_microsoft library with the client id and secret we captured earlier.
config :ueberauth, Ueberauth.Strategy.Microsoft.OAuth,
  client_id: "replace-with-id",
  client_secret: "replace-with-secret"
For our example app, we will hardcode these two values. In an actual application, you will want to keep your secret safe using something along the lines of an environment variable.
With this in place, we can now visit our app at http://localhost:4000/auth/microsoft.
This route will redirect us to the Microsoft sign-in flow. Once sign-in has been completed, we can see the app has redirected us back to our homepage. However, this time we can see the successfully authenticated flash message, including the user's email address, has been rendered to the page.